Accounts
Managing counterparties
Use the Counterparties tab to add, view, and edit a list of counterparties available to your company. You can also add newly added counterparties to multiple broker accounts at one time.
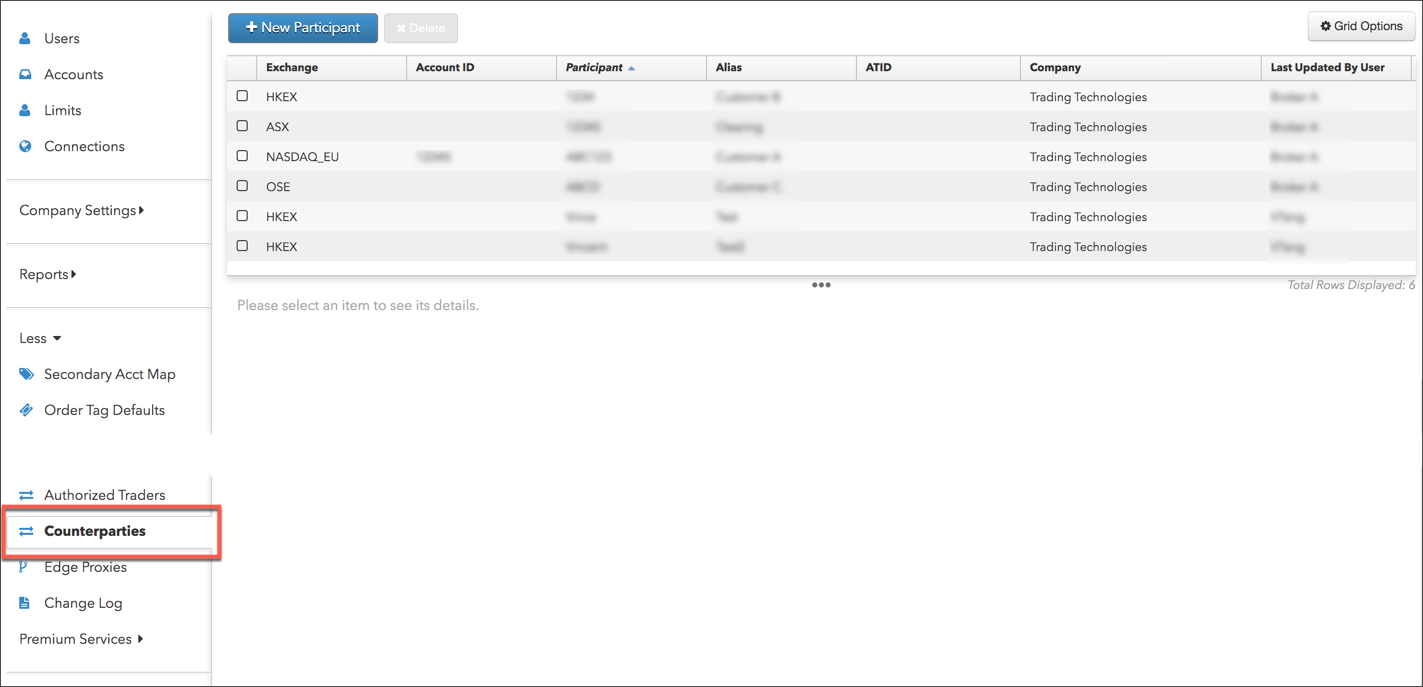
The Counterparties tab provides a shortcut to the managing counterparty identification settings available at the account-level (e.g., Accounts | Exchanges | EEX). To display the Counterparties tab, click More in the left navigation pane.
Adding a counterparty
To add a counterparty:
- Click More on the left navigation pane and select Counterparties.
- Click +New Participant at the top of the screen.
- Click Select an Exchange and scroll to and click on an exchange name.

- Enter the counterparty identification settings for the selected exchange:
- ASX:
- Participant — Enter the Participant ID assigned to the counterparty by the exchange. Each party to a Block Trade must be an eligible contract participant as defined by the exchange. Each broker can report on behalf of multiple counterparties. This is a required field.
- Alias — Auto-populates with the entered Participant value. You can manually change this value. For example, you can enter the name of the counterparty's firm as the alias. The Alias and account assigned to the counterparty appear in the Counterparty field in the TT Blocktrader widget. The counterparty selection shows the executing broker account and the counterparty alias (e.g., FCM name).
- HKEX:
- Customer Code — Enter the Participant ID assigned to the counterparty by the exchange. Each party to a Block Trade must be an eligible contract participant as defined by the exchange. Each broker can report on behalf of multiple counterparties. The customer code appears in the Counterparty field in the TT Blocktrader widget. This is a required field.
- Participant Name — Auto-populates with the entered Participant ID (customer code) value. You can manually change this value. For example, you can enter the name of the counterparty's firm as the alias.
- IDEM:
- Customer Code — Enter the Participant ID assigned to the counterparty by the exchange. Each party to a Block Trade must be an eligible contract participant as defined by the exchange. Each broker can report on behalf of multiple counterparties. The customer code appears in the Counterparty field in the TT Blocktrader widget. This is a required field.
- Participant Name — Auto-populates with the entered Participant ID (customer code) value. You can manually change this value. For example, you can enter the name of the counterparty's firm as the alias.
- NASDAQ_EU:
- Account Id — Enter the name of the account being assigned to the counterparty. Each broker can report on behalf of a specific counterparty account.
- Participant — Enter the Participant ID assigned to the counterparty by the exchange. Each party to a Block Trade must be an eligible contract participant as defined by the exchange. Each broker can report on behalf of multiple counterparties. This is a required field.
- Alias — Auto-populates with the entered Account Id and Participant values. You can manually change this value. For example, you can enter the name of the counterparty's firm as an alias. The Alias and Account Id appear in the Counterparty fields in the TT Blocktrader widget. The counterparty selection shows the executing broker account and the counterparty alias (e.g., FCM name).
- JPX:
- Customer Code — Enter the Participant ID assigned to the counterparty by the exchange. Each party to a Block Trade must be an eligible contract participant as defined by the exchange. Each broker can report on behalf of multiple counterparties. The customer code appears in the Counterparty field in the TT Blocktrader widget. This is a required field.
- Participant Name — Auto-populates with the entered Participant ID (customer code) value. You can manually change this value. For example, you can enter the name of the counterparty's firm as the alias.
- TFEX:
- Counterparty Member — Enter the Participant ID assigned to the counterparty by the exchange. Each party to a Block Trade must be an eligible contract participant as defined by the exchange. Each broker can report on behalf of multiple counterparties. This is a required field.
- Alias — Auto-populates with the entered Counterparty Member value. You can manually change this value. For example, you can enter the name of the counterparty's firm as the alias. The Alias and account assigned to the counterparty appear in the Counterparty field in the TT Blocktrader widget. The counterparty selection shows the executing broker account and the counterparty alias (e.g., FCM name).
- ASX:
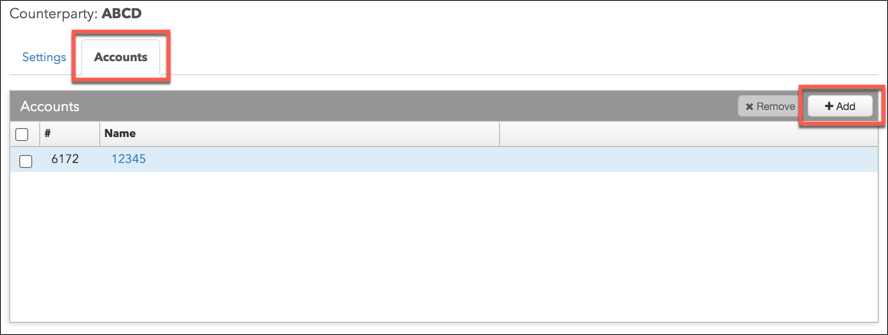
- Click the Accounts tab and click Add to assign an account to the counterparty.
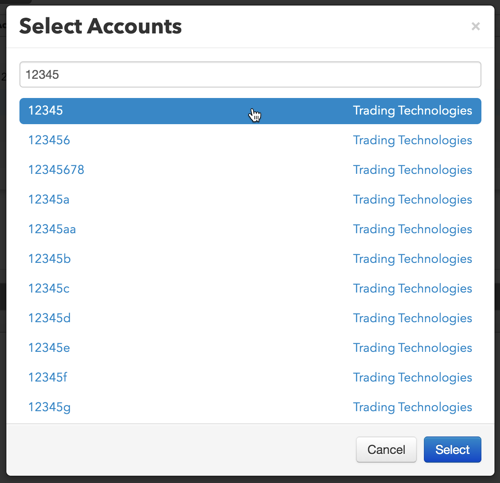
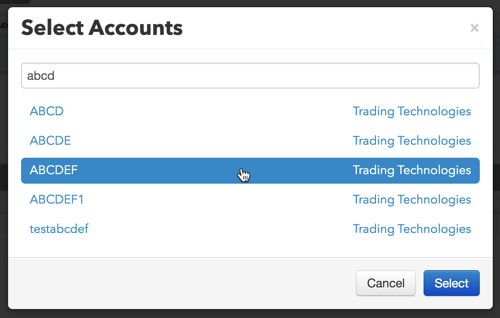
In the Select Accounts screen, find and select one or more accounts and click Select.
- Click Create.
The new counterparty appears in the data grid.
Assigning an account to a counterparty
To assign an account to a counterparty:
- Click More | Counterparties in the left navigation pane.
- Select a counterparty in the data grid.
- Click the Accounts tab and click +Add.
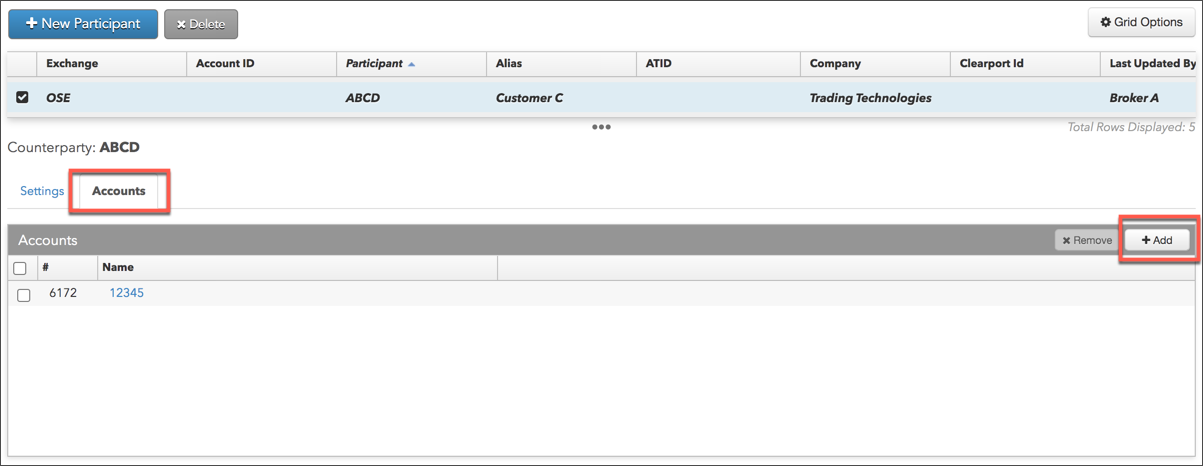
- In the Select Accounts screen, find and select one or more accounts and click Select.
- Click Save Changes
Editing or viewing a counterparty
To edit or view a counterparty:
- Click More on the left navigation pane and select Counterparties.
- In the grid, check the checkbox next to a counterparty to select it.
- Edit or view the exchange counterparty account settings for the selected record.
- Click Save Changes.
Deleting a counterparty
To delete a counterparty:
- Click to select a counterparty in the data grid.
- Click Delete.