


To add a Kalshi connection:
-
Click Connections in the left navigation panel.
-
Click +New Connection
-
Configure the settings in the General Settings section:
Field Description Required / Optional Connection Enabled Turns the connection on. Leave it cleared to save the connection without logging in to Kalshi. Required to trade Delete All Associated Orders in TT When the connection is disabled, removes the connection’s orders from TT. Optional Name A name for the connection, used to identify it in Setup and when assigning it to accounts. Optional Exchange Select Kalshi. Required Type KalshiNR (non-resilient) or KalshiRT (resilient).
See Kalshi Overview for the differences.Required 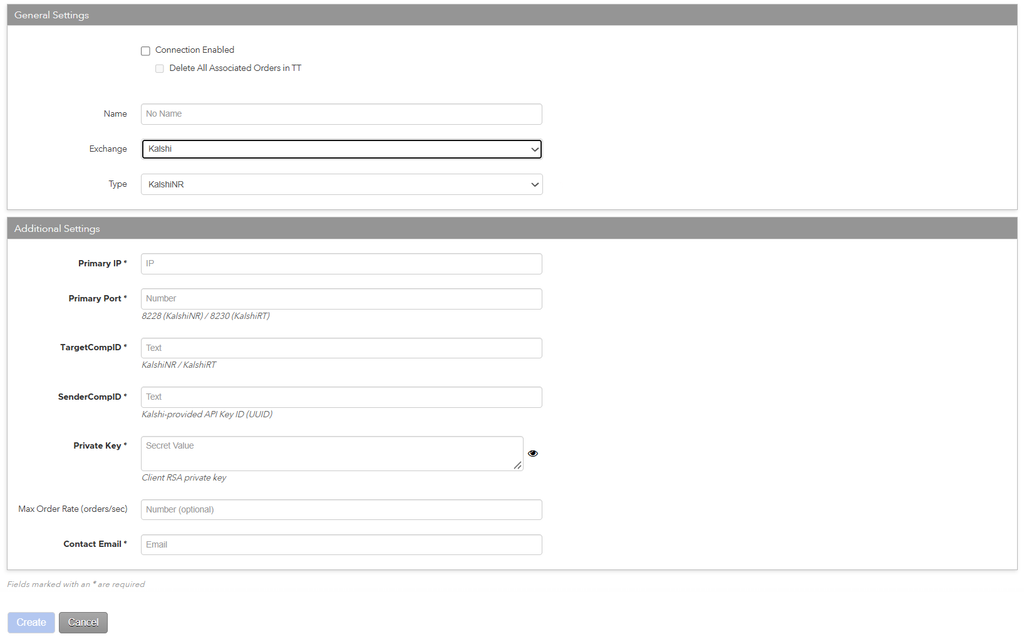
New Kalshi connection (KalshiNR) – Cancel On Disconnect is not shown 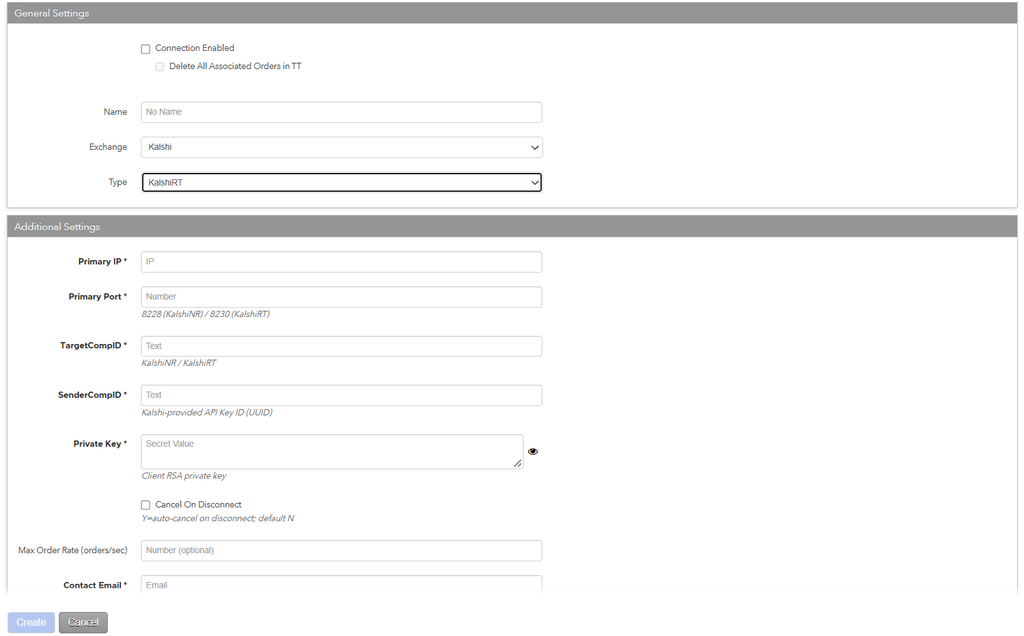
New Kalshi connection (KalshiRT) -
Configure the settings in the Additional Settings section.
-
Configure the following KalshiNR or KalshiRT settings per connection:
Field Description Required / Optional Primary IP UAT: 44.237.38.67.
Production: 146.112.61.106.Required Primary Port 8228 for KalshiNR.
8230 for KalshiRT.Required TargetCompID KalshiNR or KalshiRT. Must match the Type. Required SenderCompID Your Kalshi API Key ID, provided by Kalshi. Required Private Key The contents of the RSA private key that goes with your Kalshi API key. Paste the key itself, not a file location. The value is hidden once saved. Required Cancel On Disconnect (KalshiRT only) When selected, Kalshi cancels all working orders if the connection drops. Cleared by default. KalshiNR connections do not show this field because TT always enables Cancel On Disconnect for KalshiNR. Optional Max Order Rate (orders/sec) Limits how many orders per second TT sends on this connection. Optional Contact Email Email address TT uses to contact your firm about this connection. Required -
Click Create. You can select the connection in the data grid and review the connection settings in the Settings tab.
-
Click the Accounts tab to assign an existing account to the connection. Multiple accounts can be added to a single connection.
Note: The connection will not become active until at least one account is assigned. -
Click Save Changes.