TT Trade Surveillance gives you the ability to create and manage custom alerts that are triggered when your criteria is met for specific models, products, or scores. For example, you can create an alert that sends a user an email whenever a model scores above a certain range.
TT Trade Surveillance alerts page
Alerts and notifications are viewable from the alerts page via the TT Trade Surveillance Dashboard. As a TT Trade Surveillance administrator, you can create, enable, edit, and delete alerts from this page. As a user, you can review notifications and navigate directly to the clusters that caused the alert to trigger.
The alerts page includes the following controls:
Adding an alert in TT Trade Surveillance
Viewing an alert notification in TT Trade Surveillance
After an alert is triggered, you can view the notification on the alerts page and navigate directly to the clusters that caused the alert to trigger.
After analyzing the trading activity, you are ready to begin reviewing the clusters to determine whether additional investigation is needed. During the review process, TT Trade Surveillance lets you attach notes to individual clusters and to daily cluster groups to record your dispositions. To provide traceability, TT Trade Surveillance maintains a historical record of all notes that are added to a cluster or cluster group.
Reviewing an individual cluster
In TT Trade Surveillance, you can review clusters or cluster groups and provide disposition comments of your review. For clusters with higher risk scores, you can examine the behavior more closely and create notes of your findings. When reviewing clusters with lower scores, you can simply add a note that the cluster has been reviewed.
To review clusters:
Display the Cluster List view under the New Feed or the All Clusters page:
Click anywhere in the cluster row to view the in-line quick review:
Click on the open cluster button to view the full Cluster Scorecard view:
Evaluate the cluster details in the scorecard view and then choose your actions for a path forward. If you find the cluster activity to not requiring any further investigation or escalation, you can simply open the Status dropdown and change the status to “Closed – No Action”:
Any time a user concludes a cluster review by setting the status to Closed (including Closed – No Action, Closed – Informal Action, and Closed – Formal Action), the system mandates a closing comment to be entered:
The system records the Closed By user ID and Closed Timestamp for the final audit record.
Alternatively, if you find the activity in the cluster to be requiring further investigation or escalation, you can change the status to “Escalated” and assign this cluster to your senior team for review:
Adding clusters to a Case
After reviewing various clusters, you might determine that more investigation or follow-up is required. If so, you can open a Case from a review or add Clusters to an existing Case. Using Cases lets you create dispositions for problematic trading activity that occurs across multiple clusters or even across multiple traders and accounts.
To add a Cluster into a Case, click on the “Add to a Case” button on the top-right corner:
This will bring up two options: Add to Existing Case or Create New Case
If you wish to add this cluster to an existing case, simply click on “Add to Existing Case”. This will bring up a dialog box with a list of existing cases:
Simply select the case you wish to add this cluster to and click “Confirm”.
Alternatively, you can choose to add this cluster to a new case, in which case select “Create New Case”. This will bring up the following dialog where you can give this new case a name and set a few other attributes such as description, Assignee, Classification, Priority Level, Tags etc.
Once you are ready, simply click on “Create Case” and this will create this new case with the selected attributes.
Executing Bulk Updates
Process dozens of clusters simultaneously to improve triage efficiency. To Bulk review clusters:
Display the Cluster List view under the New Feed or the All Clusters page:
Use Multi-Select to highlight a batch of clusters in the list view. This can be achieved by either pressing Command/Ctrl and clicking to select specific clusters, or by clicking while pressing Shift to select a range:
Open the Bulk Update Clusters window by right-clicking on the selected area and selecting Bulk Update option:
Simultaneously update the Status, Classification (L1, L2, L3), and Assignee for the entire batch.
Apply specific Tags (e.g., #HighRisk, #US-Desk) or add comments for advanced categorization across the batch.
Users can also attach files to multiple clusters at once using this bulk update functionality.
Once ready, simply click “Review Changes”. This will bring up a pop-up detailing all the changes that will be made and all the clusters that this will affect. Once reviewed, click “Confirm and Apply” to make these changes.
If successful, you should see a confirmation message as such:
Viewing and managing Cases
Navigate to the Cases tab to view and manage all your cases.
Here, users can view and manage their existing cases or even open new cases.
To view an existing case, simply click on the case row and this will open a side-panel with the details of that case:
Users can view and manage all the attributes of the case such as Status, Assignee, Classification, Priority, Tags, and Description.
This side-panel also displays all the clusters that are part of this case including the total count of Associated clusters:
Users and also view and add comments or attachments directly to the case from here:
All actions taken are recorded in a forever audit trail which can be viewed under “History”:
Managing Cluster associations from within Cases
TT’s sophisticated case management system allows users to create and manage flexible case and cluster relationships. Users can link a single cluster to multiple investigations or even correct errors by removing clusters from a case.
Right-clicking on any associated cluster from within a case bring up a pop-up menu that allows users to:
Exporting Case Details
Users can now export the details of a case into a PDF. This will include all the attributes of the case such as Status, Assignee, Classification etc. as well as the list of all associated clusters. It will also include the full list of comments and the full audit history.
Score Admins in TT Trade Surveillance hold full access to the product. User Management allows you to limit that access. You can build roles from a set of capabilities (the grantable units of access, one or more per page) and assign one role to each Score Admin. The role determines which pages appear for that user and which actions they can take on each one.
User Management is where a Company Admin builds those roles and assigns them. Open it from the User Management tab in the Trade Surveillance menu bar.
User Management has three tabs:
Access to User Management
Access to User Management is granted by the Company Admin permission, which is set in TT User Setup. It is not a capability and cannot be granted by any role in Trade Surveillance — including Full-access, or a custom role built with every capability available. No role you create can be used to give a user the ability to change permissions.
Note: The TT User Setup Company Admin permission is separate from the Score Admin access level. Being a Score Admin does not make you a Company Admin, and a Company Admin can hold any access level.
Access to pages by role
Pages not granted by your role do not appear in the navigation. If an expected page is missing, your role does not grant it. Contact your Company Admin to request access.
Access to the following pages is available:
Roles and capabilities
The Roles tab lists every role available in your company.
The table shows:
Row actions appear on the right:
Icon
Action
Available on
Indicates the role cannot be modified
System roles
Clone the role into a new editable custom role
All roles
Edit the role
Custom roles only
Delete the role
Custom roles only
Use Search roles to filter the list by name.
Role types
Capabilities
Each page has an access model:
The Surveillance and Cases pages additionally include a separate grant for closing, so you can give an analyst the ability to work clusters and cases without the ability to close them.
Two rules apply throughout, in the editor and on the server:
Roles available to users
Roles apply to Score Admins. The table below lists which users can be assigned roles:
Access level
Can be assigned a role?
Reason
Score Admin
Yes
Has full access by default. These are the users that roles exist to narrow.
Score Account Admin
No
Has a reduced, predefined set of access.
Score User
No
Has a reduced, predefined set of access.
Company Admin
No
No Company Admin can change another Company Admin’s permissions, including their own.
On the Users tab, rows that you cannot assign show a Lock () icon in place of the Edit () icon. The tab lists every user in your company but only Score Admin rows are actionable.
To bring a user into the role model (e.g. an auditor), the user must first be provisioned as a Score Admin in TT User Setup. Until then their row is locked.
Note: Reports access provides access to the reports built on cluster and case data (including the Cluster List Export and Unreviewed Cluster List Export) without a separate Surveillance or Cases capability. Take this into account when you build a role around either close grant.
Creating a role
Cloning an existing role
Cloning a role is usually faster than building a completely new role and works on any role, including the two System roles.
To clone an existing role:
The clone is a custom role inheriting the original role’s capabilities. The original is unchanged.
Creating a new role
To create a new role:
The dialog lists the pages:
Page
Control
Alerts
None / View / Edit
Cases
None / View / Edit, plus the close grant
Configurable Models
None / View / Edit
Dashboard
None / Visible
DataLens
None / Visible
Company Preferences
None / View / Edit
Cross-Product Preferences
None / View / Edit
Reports
None / View / Edit
Surveillance
None / View / Edit, plus the close grant
Every page is set to None by default, so new roles start with no access. Grant only the access required for the role.
Note: User Management does not appear in the dialog. Access to it is provisioned in TT User Setup through the Company Admin permission and cannot be granted by a role.
Editing a role
To edit a role:
Note: System roles cannot be edited.
Deleting a role
Click the Delete () icon on a custom role and confirm. Deletion cannot be undone.
You cannot delete a role while any user is still assigned to it. Reassign those users first. The Assigned count on the Roles tab indicates how many users are assigned to the role.
Assigning a role to a user
The Users tab lists every user in your company.
The table includes the following:
Filter the list by access level using the All · Score User · Score Account Admin · Score Admin · Company Admin controls, or search by name or email.
To assign or change a user’s role:
The change takes effect immediately and access is recalculated across the platform within 30 seconds. A role change during a departure or an incident is effective right away rather than at the user’s next login.
Effective permissions shows the users current capabilities. Review this instead of the Role definition before saving.
Users with no role
A Score Admin who has never been assigned a role has full access. Their assignment dialog shows No role assigned — by default this will be full access, although their Effective capabilities count is shown as 0.
Existing Score Admins were all assigned Full-access when roles were introduced, so no users lost access at changeover.
Users who cannot be assigned a role
A Lock () icon in place of the Edit () icon indicates that you cannot assign that user a role. Filter by access level to see which users are eligible for role assignment. Every Score Admin row is editable, and every other row is locked. See Roles available to users for more information.
If you need to assign a role to a user and their row is locked, they must be provisioned as a Score Admin in TT User Setup first.
Auditors
Internal auditors, external auditors, and regulators often need access to your surveillance activity without any ability to change it. The Read-only role provides this.
Granting an auditor read-only access
Before you start: The auditor must be provisioned as a Score Admin in TT User Setup. Roles can only be assigned to Score Admins. Until the user’s access level is updated, the user’s row on the Users tab is locked.
To grant an auditor read-only access:
Read-only grants view access to every page and no edit or close rights on any page. It cannot be edited or deleted by any administrator.
Pair the role with the History tab to confirm that the account could not alter anything during the period under review.
Viewing the change history
The History tab records every role change and every role assignment in your company. It is read-only and append-only. No user can edit or delete an entry, including a Company Admin or a TT Super Admin.
Each entry records:
Filter the history using the All · Roles · Users controls, search by actor, or set a From and To date range.
Capability reference
Nine pages are grantable, with 18 capabilities in total. A Full-access role holds all 18, which is what a Score Admin has by default.
Granted by the Company Admin permission in TT User Setup. No role can grant it.
Your own user preferences are not gated by any capability and remain available, regardless of what role you hold.
Closing is modelled as a positive grant rather than a restriction. A role that can investigate but not close is one holding surveillance:edit without surveillance:close. There is no “cannot close” rule.
TT Trade Surveillance DataLens allows you to interact with your data directly using filter, search, and query functions. You can select a specific date and review all corresponding transactions. This provides a streamlined method to locate specific transactions and facilitates rapid investigations.
The DataLens tab is available from the Trade Surveillance menu bar.
Viewing Data
To view data:
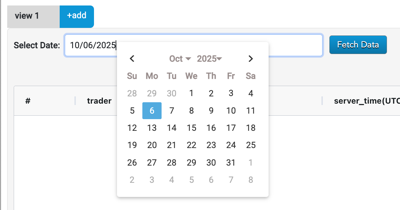
Select a date. The default is the current date.
Select Fetch Data.
The transactions for that date are displayed. As you scroll down, more rows will load if they are available.
Viewing Data for Multiple Dates
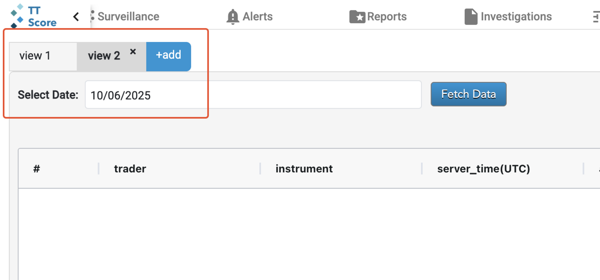
Each tab displays data for one date. You can open multiple tabs simultaneously to display data for different dates by selecting the +add button in the upper-left corner of the screen. This opens a new tab where you can select a new date to view.
Note Switching between tabs does not reset the applied filters.
Filtering Data by Column
You can refine the data visible in the table by applying multiple column-level filters (e.g., trader, instrument, account, price, etc.) simultaneously.
To apply column-level filters:
Hover over the area to the right of the column header name, select the menu ( ) button, then select the filter tab.
OR
Select the Filters side menu and expand the column(s) to be filtered.
Select the desired filter operator(s) and enter your search terms.
Note The selected filter type determines which operators are available in the drop-down
You can apply multiple filters to the same column using AND or OR logic.
Select Apply.
The filtered results display.
When a filter is applied, a filter ( ) icon will appear beside the column name.
You can filter multiple columns for a view simultaneously. Repeat the steps above to add additional filters.
Column Filter Operators
DataLens provides multiple types of filters. The selected column filter determines which operators are available in the drop-down.
Text-Based Field Operators
For text-based fields such as account or instrument, DataLens supports the following operators:
Equals
Does not equal
Contains
Does not contain
Begins with
Ends with
Numerical Field Operators
For numerical fields such as price or qty, DataLens supports the following operators:
Equals
Does not equal
Less than
Greater than
Less than or equal to
Greater than or equal to
Between
Resetting Column-Level Filters
To reset all filters and the search terms: select the Reset button. The column will display the full, unfiltered dataset.
Adding and Removing Columns
Similar to other audit trail views, you can add or remove visible columns.
To add or remove columns, hover over the area to the right of any column header and select the columns ( ) button. The columns are added or removed immediately.
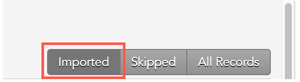
Viewing Imported or Skipped Data
Data that was received and processed by TT is displayed in 3 different views:
Imported
Skipped
All Records
The Imported view is the default and displays all of the records that were successfully processed by TT.
The Skipped view displays all of the transactions that were skipped.
Skipped records appear in grey and contain an “invalid_reason” column which provides the reason the record was skipped.
The All Records view displays all imported records as well as skipped records.
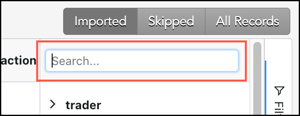
Searching Data
You can search by entering terms in the search bar on the right side of the columns.
TT Trade Surveillance provides a comprehensive surveillance and case management toolset for analyzing and reporting on trading activity. You conduct reviews in TT Trade Surveillance by focusing on unreviewed high-risk items and clear daily “noise.”
The Surveillance New Feed Tab
The New Feed tab is the starting point for your surveillance activities, serving as your prioritized to-do list.
Managing the New Feed Tab
Manage the content displayed in your New Feed tab through the preferences. Here, you can customize your view by setting criteria such as the minimum cluster score, desired cluster status, specific models, and relevant date range for the clusters you want to see. All of these settings can be adjusted in the Preferences tab to meet your specific needs.
Analyzing trading activity using data visualizations
Once you are in the New Feed, you can use TT Trade Surveillance’s data visualizations to identify clusters of problematic trading activity.
TT Trade Surveillance provides the ability to review clusters at various levels of granularity: the cluster group level, the cluster list level, and the individual cluster level.
Identify concentrations of problematic activity using the following views:
Review the list of “New” (unreviewed) clusters that require immediate attention.
Observe the KPI widgets at the top of the screen to identify SLA Breach Risks (e.g., L1 alerts overdue by 24h).
Set your goal to move items from New to Closed, In Progress, or Escalated to achieve a “Zero Inbox.”
Claiming Ownership and Assigning Work
To establish accountability for individual clusters:
Performing an Inline Review (Quick View)
To assess cluster metrics without navigating away from the main list.
Investigating via the Cluster Scorecard (Full View)
Access a centralized view for deep-dive analysis and actions.
Reviewing and Adding to Cases
Review the Cluster and add to a case if required from within the Cluster Scorecard view










 ) button, then select the filter tab.

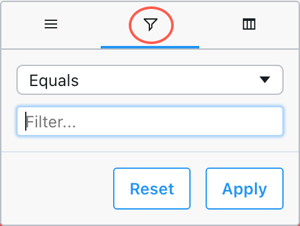


 ) icon will appear beside the column name.


 ) button. The columns are added or removed immediately.